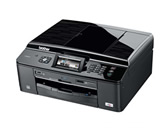
MFC-J825DW
FAQs & Troubleshooting |
Preview the faxes I receive before I print them.
The Fax Preview feature allows you to preview received faxes on your Brother machine's LCD by pressing the FAX PREVIEW button.
When Fax Preview is turned on, a message will appear on the LCD of the Brother machine alerting you when you receive new faxes.
- TURNING FAX PREVIEW ON
- USING FAX PREVIEW
- DELETING ALL FAXES IN THE LIST
- PRINTING ALL FAXES IN THE LIST
- TURNING FAX PREVIEW OFF
TURNING FAX PREVIEW ON
- Press Menu.
- Press the UP OR DOWN ARROW key to display Fax.
- Press Fax.
- Press the UP OR DOWN ARROW key to display Setup Receive.
- Press Setup Receive.
- Press the UP OR DOWN ARROW key to display Fax Preview.
- Press FAX PREVIEW.
- Press On.
- Press Yes.
- The LCD will tell you that any future faxes will not be printed as you receive them. Press Yes.
- Press the STOP/EXIT key.
- When Fax Preview is turned on, a backup copy of received faxes will not be printed for Fax Forwarding and PC-Fax Receiving operations, even if you have set Backup Print to On.
USING FAX PREVIEW
When you receive a fax, you will see a pop-up message on the LCD.
- For example: New Fax: 01 Press [Fax Preview].
When this message appears, follow these steps to preview a fax:
- Press Fax Preview. The LCD will display the new fax list.
You can also see your old fax list by pressing the Old Fax tab on the LCD. Press the New Fax tab to go back to your new fax list.
- Press the UP OR DOWN ARROW key to display the fax number of the fax you want to see.
- Press the fax you want to see.
- If your fax is large there may be a delay before it is displayed on the LCD.
- The LCD will show the current page number and total pages of the fax message. When your fax message is over 99 pages the total number of pages will be shown as "XX."
The button will appear on the LCD and you can perform the operations shown below:
 : Enlarge the fax.
 : Reduce the fax.
- UP OR DOWN ARROW: Scroll the fax vertically.
- LEFT OR RIGHT ARROW: Scroll the fax horizontally.
 : Rotate the fax clockwise.
 : Delete the fax. You must then confirm this deletion by pressing Yes.
 : Go back to the previous page.
 : Go to the next page.
 : Go back to the fax list.
 : Print the fax.
Do one of the following:
- Press Print All Pages to print the whole message.
- Press Print Displayed Only to print only the displayed page.
- Press Print From Displayed to print from the displayed page to the last page.
- Press Print All Pages to print the whole message.
 : Close the preview table. If you want to show the buttons on the LCD again, press More.
- If your fax is large there may be a delay before it is displayed on the LCD.
- Press Stop/Exit.
DELETING ALL FAXES IN THE LIST
- Press FAX PREVIEW.
- Press More.
- Press Delete All.
- Press Yes to confirm.
- Press the STOP/EXIT key.
PRINTING ALL FAXES IN THE LIST
- Press FAX PREVIEW.
- Press More.
- Press Print All.
- Press the STOP/EXIT key.
TURNING FAX PREVIEW OFF
- Press FAX PREVIEW.
- Press More.
- Press Turn Off Fax Preview.
- Press Yes to confirm.
- If there are faxes stored in the memory, do one of the following:
- If you do not want to print the stored faxes, press Continue. Press Yes to confirm. Your faxes will be deleted.
- If you want to print all the stored faxes, press Print all faxes.
- If you do not wish to turn off Fax Preview, press Cancel.
- If you do not want to print the stored faxes, press Continue. Press Yes to confirm. Your faxes will be deleted.
- Press STOP/EXIT.
Content Feedback
To help us improve our support, please provide your feedback below.
