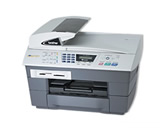
Drivers/Windows® XP Home/Professional

Add Printer Wizard Driver

Brother tested printer drivers for use in the Windows® 'Add a Printer' wizard.

Latest Version: BRelease Date: 02/02/2005
You can download the file at the end of this page.
Please read the How to download and install instructions beforehand.
How to Download and Install
  1. Make a temporary directory on your HDD to save the downloaded self-extracting file, e.g. C:\brodnt
  2. Start downloading.
  3. Once downloading is complete, double click on the downloaded file to extract it.

    Note for English driver Users:
    Two folders, "UK-ENG"  and "US-ENG" will be created.
    -The "UK-ENG" folder contains drivers written in English.
    -The "US-ENG" folder contains drivers written in American English.

  4. For Windows® 2000 Users:
    Click on "Start"=>"Settings"=> "Printers" =>"Add Printer".

    For Windows® XP Professional Users:
    Click on "Start"=>"Printers and Faxes"=>"Add a printer".

    For Windows® XP Home Edition Users:
    Click on "Start"=>"Control panel" =>"Printer and other hardware"
    =>"Printer and Faxes"=>"Add a printer".

    Then click on "Next".
  5. Set "Network printer" for the target printer and click on "Next".
  6. Input the Network Printer's Name, e.g. \\server\MFC-xxx
  7. Click on "Next".
  8. Click on [Have Disk] and type the directory where the extracted files exist or select [Browse] and click on the drop down menu in the DRIVES field and select the directory where the extracted files exist.
  9. Click on "Open".
  10. Click on "OK".
  11. Select the model name and click on "Next".
  12. Name the printer and select a default printer and click on "Next".
  13. Test Print dialog appears. Click on "Finish".


Language Version Size Release Date File
English B 6.10MB 02/02/2005 Download
Update History

Version B
Fixed a problem where the correct paper size is not selected when printing from Microsoft Word.

Version A